Showing posts with label crafts. Show all posts

April 17, 2009

fabric contest

WOW! I just got an email from the wonderful people at Spoonflower giving me the heads-up that they are running my fabric design for this week's contest, along with other wonderful designs. I have been waiting for this e-mail for so long! (a little bit of exaggeration here :) Just too excited). OK, here are some images of my fabric design already printed. Many of you ordered a little piece from my shop already and I got nice feedback, thanks! The designs are not up yet but sometime this Friday they will, so go and vote for your favorite fabric at www.spoonflower.com (Hope is mine though, just kidding :)


April 4, 2009

better


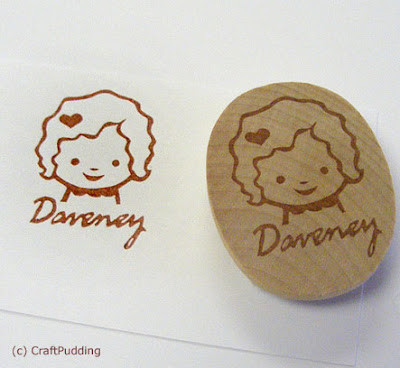
I just added to the shop this rubber stamp. This stamp is not hand carved but it looks just like my 'little girl' personalized hand carved rubber stamp. These are way better and I love the fact that they look more professional without loosing the hand made feeling, besides, I am more productive this way and I will have more time to come up with more and new designs with the same hand carved look.

March 31, 2009

blythe


I am so busy as usual and I am grateful for that, but I could not let my blog without a little post. This time is to show my mom's exquisite crochet. She fell in love with Blythe (more than I did, I think) and started to make beautiful crochet outfits. She made several for my own Blyhte and now she expanded and opened her own etsy shop called Blue Nest Boutique. Here is an etsy mini from her shop for all the Blythe lovers:


And here is her FLICKR gallerie for more beautiful crocheted designs. LINK: Blue Nest Boutique


March 4, 2009

tutorial - baby food jar pincushion

Finally! After so many months of procrastination I managed to finish this tutorial and share it. A few of you were begging to hurry up and post this tutorial already, sorry about the delay ladies.

OK, let's go directly to work. For this pincushion your will need...

Any size baby food jar (empty and clean of course. I like the tiny ones), glue gun, thread and needle, poly fill (that is how is called, right?) or fluffy pillow stuff, a piece of fabric cut in a 5" diameter circle and some ribbon (enough to cover around the jar lid).


Make a knot at the end of your thread and needle so it does not come off the fabric. Take needle and tread and sew around your fabric circle over the edge, DO NOT finish off. Use a simple stitch because you will be pulling the thread to close the circle. While you do this your glue gun should be getting hot and ready to use.


Place the handful of fluffy pillow stuffing in the middle of your fabric and gather by pulling your thread with the needle.


Use you hand to squish the fabric and stuffing to give it some shape and to continue sewing around.


Secure with a knot, and finish off. Cut your thread and the top of your pincushion should look like this.


This is how you will place the pincushion over the jar lid (please ignore that pink thread coming out from under the lid).


With your glue gun ready, pour enough glue on top of the lid. Be careful because the lid gets hot (I know, my poor glue gun looks disgusting. I will get a new one, I promise)


Immediately after you put some glue on your lid, place the pincushion on top (stitched part down)and press firmly to glue it to the lid. Keep pressing until the hot glue has cooled down and the pincushion stays on there neatly.


This is how the jar and lid should look after gluing the pincushion part.


To conceal the messy part of the pincushion and lid, we are going to glue some ribbon around the lid. Use a wide enough ribbon so it covers part of the lid and part of the pincushion edge too. Work this part little by little to make a neat finish and be careful with the hot glue.


Glue all the way around the lid, secure and cut the excess ribbon.


VoilĂ ! Our pincushion is finished :)


I hope you enjoy this tutorial. If you have any questions or there are some typing mistakes, please let me know.
Thanks for stopping by!

February 24, 2009

again

Well, one of my New year's resolutions was to blog more often, at least 2 times during the week, I told myself. It is just too hard to organize myself and do everything in a more structured manner, I am just so busy trying to catch up with work and the everyday chores. In addition to that, I get easily distracted by ideas and want to try them right away, I am just too impatient at times. Anyway, I am finally catching up with work but I am so behind it won't surprise me to get a few negative feedback comments at the shop (crossing my fingers so it does not happen). I have been sending extra goodies along the orders just to make up for the delay, hope that helps a bit. I am just too perfectionist at times, and concerning work everything has to be perfect and that takes time.

But in another note, I have been very fortunate about custom requests. I love designing and drawing, and that is what I have been doing besides carving stamps. here are a couple ready carved stamps.


This next image is of a soon to be stamp and I designed it too. I can't wait to see how this one turns out! Oh, and I will be making some t-shirts with this image as well, love it!


And last but not least, here are some ceramics I made. I made some Valentine's day heart pins but they did not sell. I think I was too late to add them to the shop, but they are pretty and will stay there until they go.


I will be back with more. I am so impatient to blog some tutorials that I have ready but need to edit them. I need to finish making stamps needed to go to their respective homes and then I promise those tutorials will make it here for me to share with you.

January 19, 2009

Happy New year!

I hope everybody had a wonderful holiday season! I indeed had a nice vacation and enjoyed spending time with my family. But I am finally back, ready to work , energized and creative.

Despite of the cold weather and tons of snow that we are receiving from mother nature, I have been quite busy doing lots of crafty things this month. I have updated my shop and added new stamps, they are all available now and here you can see some pictures.


I have been "baking" like crazy, but not regular baking since I am not very good at cooking and baking :P. I am talking about "baking" little shrink plastic projects such as brooches, hair clips and buttons (some of these are available at my shop).
This is a lot of fun and these are some photos of what I have been making with this wonderful material (I will have a free tutorial on this pretty soon too).


Another project (this came out of an unfortunate situation) is this t-shirt I made for my daughter. Well I did not make the t-shirt but I made the iron-on design shown on it. This came to me after a friend of mine wrote me to tell me that she found a photo of someone else that copied my design to put it on t-shirts. But the problem is that this person never asked for permission and is giving herself credit for the design. I have been reading a lot of stories like this around the Internet; it is very frustrating and disappointing. The picture below is the t-shirt I made using my own design.


In another more happy note, I want to remind you that I will continue posting free tutorials and more embroidery patterns. I have new designs for embroidery that I am very impatient to try and share with you. The next tutorial is coming soon and it will feature the shrink plastic projects.

I leave you for today with some pictures of the snowstorms we received a day before Christmas. Happy New Year!


December 1, 2008

stamp carving books and tutorials

Hello everybody! I am sorry I have been away for so long, I am totally swamped with work at my etsy shop and there is just not enough time for blogging more often. Tonight I had to take a break and stop by to say hi to all the wonderful visitors of my blog. I am very thankful for all the nice comments I receive from all of you, that is what keeps me going.

I also have been getting a lot of questions concerning my hand carved stamps. I wish I could answer every e-mail I receive, many of them asking about techniques, material, design and all the process involved in this fun craft. But because I get almost the same questions dozens of times it would be really hard for me to answer each one of them individually, besides there is just not time (sigh). I think I promised (way) long time ago to create and post a stamp carving tutorial for all of those interested in making their own rubber stamps, but after searching the Internet I found so many good ones that I decided to post the links for everybody right here.

I thought too that it would be useful to show you some of the books that I use for inspiration and techniques as well, but the truth is that all what it takes is practice and imagination. After that, you will come up with your own techniques and find the materials and tools that you feel work better for you.

OK, I will start with the books...

This is my small collection of books and you can purchase them at www.yesasia.com which I prefer over all the sites that sell Japanese crafting books (they give you free shipping if you buy more than 25.oo usd in some items)


From left to right and top to bottom: ISBN 9784479920014; ISBN 9784309280400; ISBN 9784529043397
NOTE: just type the ISBN in the search window at yesasia.com to find each book.


A couple more books and from left to right: ISBN 9784834727098; ISBN 9784277430654

The last two from my collection: ISBN 4834723542; ISBN 4391129914 (this last one was a gift from my flickr friend Yvonne)

And a couple shots of the inside pages...


Now some interesting and REALLY good tutorials...

Alma Stoller has a really nice and very original tutorial here at her blog-> LINK

I found this one at Kucachoo Crafts where they use the tools that I started with to carve my first wee stamps.-> LINK

Super talented Holly McGuire from two cheese please has a very good tutorial right here, she uses different tools and materials-> LINK

FranOnTheEdge has a very well illustrated stamp carving tutorial and gives several stamping techniques-> LINK

Junie Moon uses some of the same tools I use right now -> LINK

I love Carolyn Hasenfratz tutorial, this was the tutorial I first found when I just started carving stamps and it was very helpful to me in order to learn how to use the tools. The illustrations, material list, tips and instructions are wonderful -> LINK

RUBBER STAMP CARVING TIPS by Kirbert was one of the first tutorials I used too -> LINK

This Rubber stamp carving tutorial by Vonvonz is super cute and very well illustrated -> LINK

There are many, many more stamp carving tutorials by very talented people. I will keep posting the links and any other nice books. If you have any questions or you find a mistake on this post (ISBN or links) please let me know by adding a comment to this post.

October 23, 2008

carving fun

Just a quick stop to say hi! And show you some of the stamps I have been working on for the last weeks.

Love this one


Designed by me


Family stamps